When and Why: A Professional’s Guide to Replacing Pool Tiles
Why Pool Tiles Matter: More Than Just a Pretty Face

After spending nearly five decades designing and building custom pools, I've learned that pool tiles are a lot like a good suit - they need to look sharp, but they also need to do their job. Let me tell you why these seemingly simple pieces of material are crucial to your pool's success story.
Think of pool tiles as your pool's armor and evening wear rolled into one. They're not just there to make your pool Instagram-worthy (though they certainly do that). In my experience, they're your first line of defense against the elements, and believe me, I've seen what happens when this defense isn't up to par.
The Guardian of Your Pool’s Structure
Here's something most people don't realize: your pool tiles are actually protecting a significant investment. They create a waterproof barrier that prevents water from seeping into your pool's structure. I remember a client who decided to "save money" by skipping the waterline tiles - let's just say the repair bill two years later would have paid for those tiles several times over.
The Beauty Factor
But let's talk aesthetics, because this is where pool tiles really shine (sometimes literally!). I like to tell my clients that pool tiles are like jewelry for your backyard - they can either whisper or make a statement. The right tiles can transform an ordinary pool into a resort-style oasis. I recently completed a project where we used iridescent glass tiles at the waterline, and when the sunset hits them... well, let's just say the neighbors keep finding excuses to stop by.
The Long-Term Value Proposition
Here's what I've learned from decades in the business: investing in quality pool tiles upfront is like buying a well-made watch. Sure, you could go cheaper, but you'll likely end up spending more in the long run. Quality tiles, properly installed, can last 15-20 years or more. They resist chemical damage, stand up to UV rays, and maintain their color even after years of California summers (and yes, I've seen plenty of those).
The Maintenance Factor
One often-overlooked benefit of quality pool tiles is their impact on maintenance. Well-chosen and properly installed tiles make your pool easier to clean and maintain. The smooth, non-porous surface of quality tiles means less algae buildup and easier cleaning. As I often tell my clients, "You can spend your weekends scrubbing your pool, or you can spend them enjoying it."
Looking back at hundreds of pool projects, I can confidently say that tile selection is one of the most crucial decisions you'll make in your pool design journey. It's not just about picking something pretty - it's about choosing a material that will protect your investment, enhance your enjoyment, and stand the test of time.
Remember, you're not just building a pool; you're creating a backyard retreat that will serve your family for years to come. The tiles you choose today will quite literally set the tone for all those future pool parties, quiet evening swims, and weekend relaxation sessions.
Signs It’s Time for Tile Replacement: Don’t Wait Until It’s Too Late

After nearly five decades in the pool industry, I've developed what I like to call my "pool whisperer" senses. Just like a skilled mechanic can hear when a car engine isn't quite right, an experienced pool builder can spot tile trouble before it becomes a major headache. Let me share some insider knowledge that could save you thousands in repairs.
The Visual Red Flags
First, let's talk about what I call the "obvious offenders." If your pool tiles are cracking, chipping, or pulling a disappearing act by falling off, that's your pool's way of waving a red flag. Think of it like a crack in your smartphone screen – it might start small, but it rarely stays that way.
What really concerns me is what I call the "white whispers" – those chalky, white deposits creeping across your tiles. This calcium buildup isn't just unsightly; it's often a sign of underlying chemical imbalances. I recently visited a client who thought these deposits were just "normal aging." Unfortunately, by the time they called me, the damage had spread far beyond the surface.
The Hidden Warnings
Here's something most homeowners miss: check your grout lines. If they're crumbling like an old cookie, water is likely seeping behind your tiles. In my experience, compromised grout is like a leaky roof – ignore it, and you're asking for trouble.
Pro tip: Run your hand along the waterline tiles. If they feel loose or hollow when you tap them, that's not a good sign.
Safety Concerns
Let's be frank – sharp edges from broken tiles are like tiny daggers waiting for an unsuspecting swimmer. I've seen too many pool parties end with Band-Aids and apologies. When safety is compromised, replacement isn't just an option; it's a necessity.
Early Detection Saves Money

Here's a pattern I've noticed over the years: the homeowners who regularly inspect their pools tend to catch issues early. It's like dental check-ups – a little prevention goes a long way. I recommend doing a thorough tile inspection at least twice a year, ideally at the start and end of swimming season.
Time for Action When You Notice:
- Cracks or chips in multiple tiles
- Hollow sounds when tapping tiles
- Grout that's falling out or severely discolored
- Tiles that move when pressed
- Persistent white scaling that won't clean off
- Water seepage behind tiles
Remember, your pool is an investment in your family's lifestyle and your home's value. When it comes to tile replacement, the old saying rings true: "An ounce of prevention is worth a pound of cure." Or in pool terms, a timely tile replacement is worth a dozen emergency repairs.
Understanding Pool Tile Options: Choosing Your Pool’s Perfect Match

In my years of building custom pools, I've watched pool tile options evolve like the smartphone industry – constantly improving, with exciting new possibilities emerging every year. Let me guide you through today's top choices, sharing insights I've gained from hundreds of successful installations.
Glass Tiles: The Luxury Choice
Think of glass tiles as the Tesla of pool tiles – premium, eco-friendly, and undeniably stunning. I recently completed a pool in La Jolla using iridescent glass tiles, and the way they catch the light makes the water look like liquid diamonds. While they're the most expensive option (typically $30-50 per square foot), their durability and visual impact make them worth considering for discerning homeowners.
Expert Swimming Pool Contractors Los Angeles: Glass tiles are recyclable and environmentally friendly – a great choice for eco-conscious families.
Porcelain Tiles: The Smart Investment
Porcelain tiles are like a high-end hybrid car – reliable, efficient, and offering excellent value. At $17-25 per square foot, they provide the perfect balance of durability and aesthetics. I often recommend these to my clients with active families because they're:
- Extremely durable
- Frost-resistant
- Excellent for both waterline and full-pool applications
- Available in countless styles
Natural Stone: The Classic Beauty
Natural stone tiles are comparable to a classic luxury car – timeless, distinctive, but requiring more attention. They create a gorgeous, organic look that's particularly popular in Mediterranean-style pools. However, be prepared for more maintenance and periodic sealing.
Ceramic Tiles: The Practical Choice
Think of ceramic tiles as your reliable family sedan – dependable, cost-effective ($15-20 per square foot), and getting the job done with style. While they might not have the wow factor of glass tiles, they offer:
- Good durability
- Wide color selection
- Excellent value
- Easy maintenance
Cost Comparison and Value Analysis
Here's what I tell my clients about pricing:
Material | Cost/sq ft | Durability | Maintenance |
|---|---|---|---|
Glass | $30-50 | Excellent | Low |
Porcelain | $17-25 | Excellent | Low |
Natural Stone | $20-35 | High | |
Ceramic | $15-20 | Good | Medium |
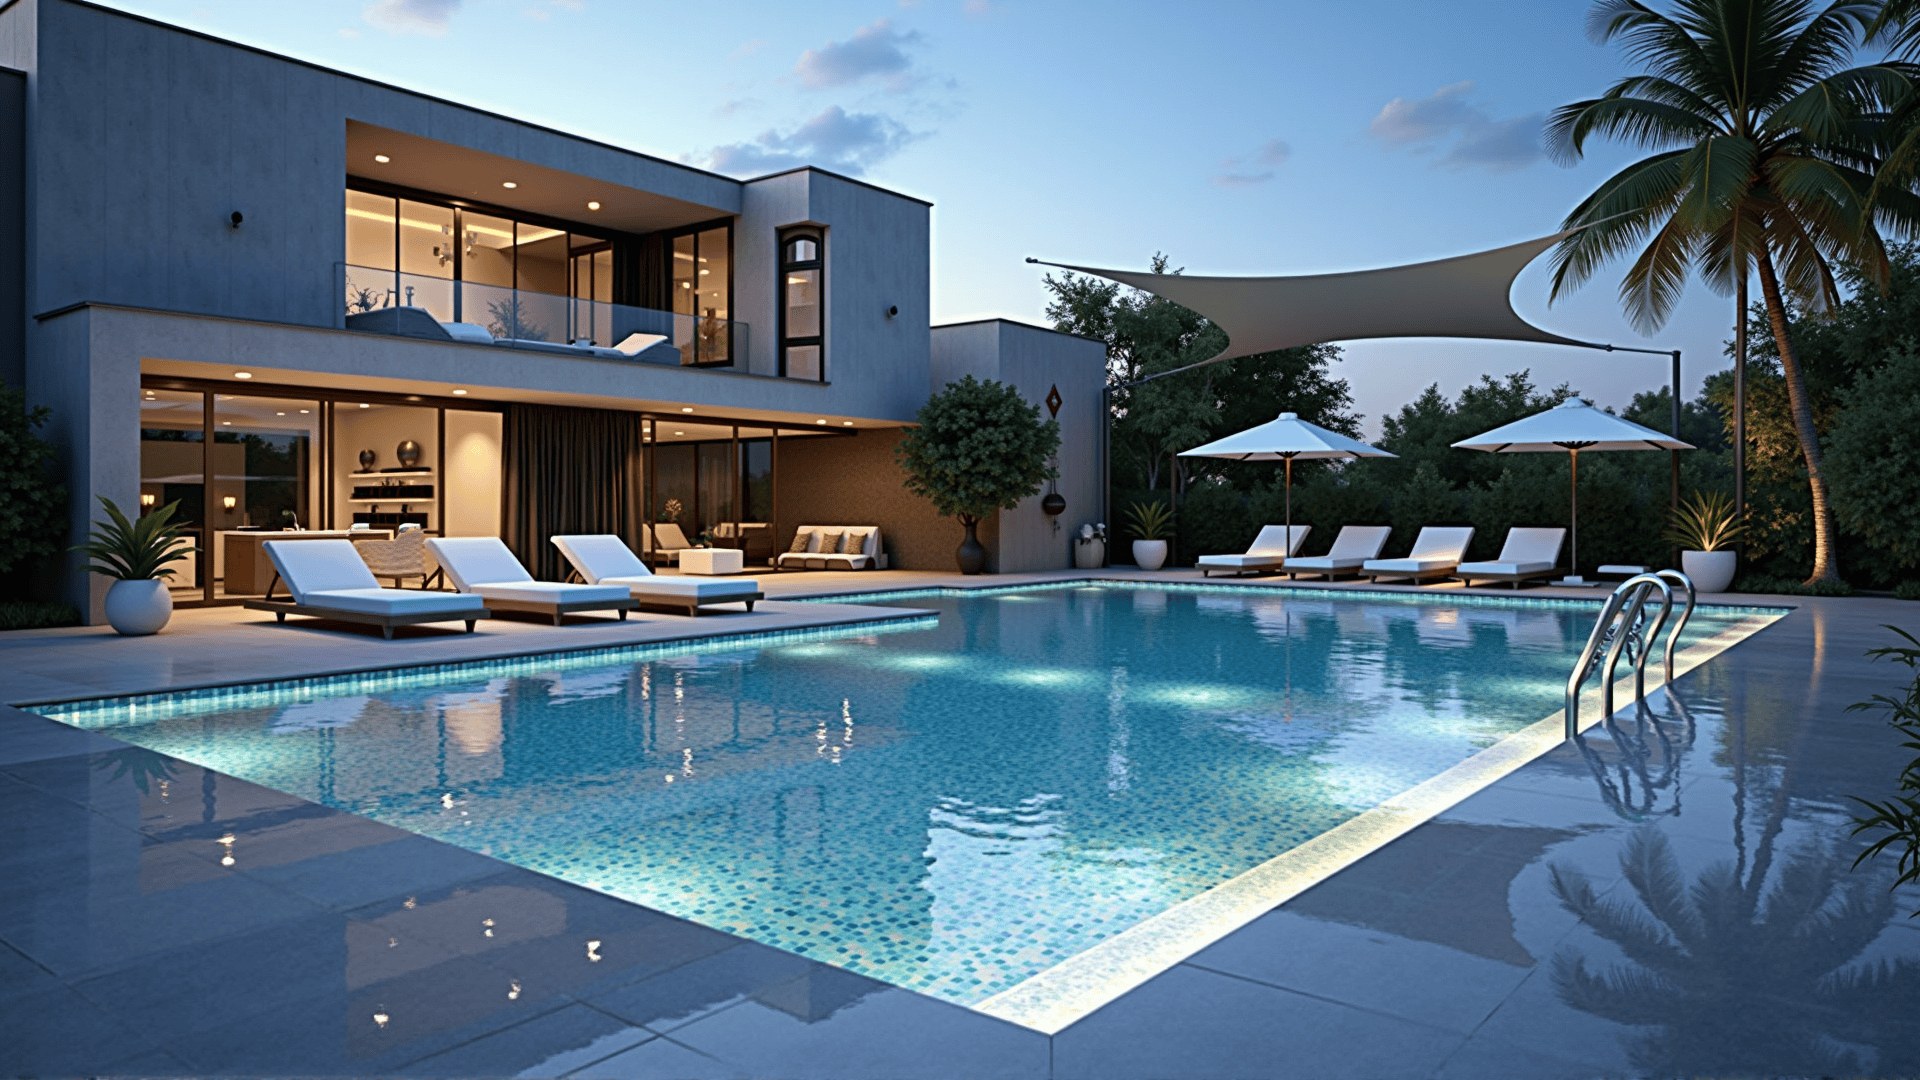
Making Your Choice
The best tile choice depends on several factors:
- Your budget
- Local climate conditions
- Desired maintenance level
- Overall pool design
Remember, like any significant home improvement decision, tile selection should balance immediate appeal with long-term practicality. In my experience, most homeowners are happiest when they choose the highest quality tile their budget allows, particularly for waterline applications where the tiles are most visible.
Design Considerations: Creating Your Pool’s Signature Look

After designing countless pools over the decades, I've learned that choosing pool tiles is a bit like selecting the perfect artwork for your living room – it sets the tone for the entire space. Let me share some insider perspectives on creating a design that you'll love for years to come.
Current Trends Worth Considering
The pool design world is evolving rapidly. Right now, I'm seeing a strong shift toward what I call "subtle sophistication." One of my recent projects featured a stunning combination of deep blue glass waterline tiles that transition into lighter shades – creating an effect that mimics the ocean horizon. It's these thoughtful details that transform a pool from a simple water feature into a backyard masterpiece.
The Waterline Sweet Spot
The waterline tile selection is crucial – it's like choosing the perfect frame for a painting. Here's what I've learned works best:
- Dark colors create a mirror-like water surface
- Light colors make the pool appear larger
- Iridescent tiles add sparkle and movement
- Textured tiles create interesting light play
Expert Pool Installer Los Angeles Tips: Consider how your waterline tiles will look both wet and dry – they'll spend time in both states.
Harmonizing With Your Space
Think of your pool as part of your home's overall story. I recently worked with a client who had beautiful travertine patio pavers. We selected pool tiles that complemented, rather than matched, the pavers – creating a cohesive look without being monotonous. It's about finding that perfect balance, like coordinating furniture pieces in a well-designed room.
Creating Focal Points
Strategic tile placement can guide the eye and create visual interest. Consider:
- Accent strips at the waterline
- Mosaic designs on steps or benches
- Special patterns in shallow areas
- Contrasting borders
One of my favorite projects involved creating a subtle wave pattern using varying shades of blue tiles. During sunset, it creates an almost magical effect that never fails to draw compliments.
Practical Meets Beautiful

Here's something many people overlook: your design choices should consider functionality. For instance, darker tiles at the waterline can help mask the calcium line that naturally forms over time. It's like choosing a carpet color that won't show every little speck of dust.
Practical Meets Beautiful
Here's something many people overlook: your design choices should consider functionality. For instance, darker tiles at the waterline can help mask the calcium line that naturally forms over time. It's like choosing a carpet color that won't show every little speck of dust.
Future-Proofing Your Design
While trends come and go, classic designs endure. I always
- advise my clients to:
- Choose timeless patterns over trendy ones
- Select colors that complement their home's architecture
- Consider how the design will age
- Think about resale value
Remember, the best pool design is one that brings you joy every time you step into your backyard. It should feel both exciting and timeless, like a well-designed kitchen that you never tire of using.
The Replacement Process: Your Pool’s Transformation Journey

Having overseen countless pool tile replacements over my career, I can tell you it's a bit like conducting an orchestra – every step needs to be precisely timed and executed. Let me walk you through what makes a successful tile replacement project, sharing some insights I've gained from decades in the field.
Professional Assessment: The Critical First Step
Just as a doctor wouldn't prescribe medication without a proper diagnosis, we never start a tile replacement without a thorough assessment. I remember a client who thought they needed a full tile replacement, but our inspection revealed the issue was isolated to just one section, saving them thousands of dollars. During the assessment, we evaluate:
- Structural integrity
- Water damage extent
- Substrate condition
- Potential underlying issues
Surface Preparation: The Foundation of Success
Here's something I always tell my clients: proper preparation is 80% of a successful tile installation. Think of it like painting your house – skip the prep work, and you'll regret it later. Our process includes:
- Careful removal of old tiles
- Surface cleaning and repair
- Waterproofing application
- Surface leveling
Pro tip: We use advanced moisture meters to ensure the substrate is perfectly dry before installation – a step many contractors skip.
Installation: The Art and Science
The installation process is where experience really matters. I've developed a methodical approach that ensures lasting results:
1. Layout Planning
- Strategic tile placement
- Pattern alignment
- Cut tile minimization
2. Adhesive Application
- Temperature-appropriate materials
- Proper troweling techniques
- Consistent coverage
3. Tile Setting
- Precise spacing
- Level checking
- Clean as we go
The Finishing Touch: Proper Curing
This is where patience becomes crucial. I often tell clients it's like waiting for a fine wine to age – rushing the curing process can ruin the entire project. Our process includes:
- Controlled environment monitoring
- Proper grout application
- Sealer application (when needed)
- Final inspection
Important note: While some contractors might rush this phase, we insist on proper curing time to ensure longevity.
Quality Control
We implement multiple checkpoints throughout the process, much like a pilot's pre-flight checklist. Each phase is photographed and documented, ensuring nothing is overlooked. Our attention to detail has saved our clients from future headaches countless times.
Remember, a proper tile replacement isn't just about making your pool look good today – it's about ensuring it remains beautiful and functional for years to come. When done correctly, you shouldn't have to think about your pool tiles again for at least 15-20 years.
Cost Factors to Consider: Investment in Your Pool’s Future

After spending nearly five decades in the pool industry, I've had countless conversations about costs with homeowners. Let me share something I've learned: understanding pool tile costs is like planning a home renovation – it's not just about the price tag on the materials, but the entire value proposition.
Breaking Down the Costs
Let me walk you through the real costs involved, based on what I've seen in hundreds of projects:
Material Costs
Think of tile materials like buying a car – there are different classes with varying benefits:
- Economy (Ceramic): $15-20/sq ft
- Mid-Range (Porcelain): $17-25/sq ft
- Luxury (Glass): $30-50/sq ft
- Premium (Designer/Custom): $40-75/sq ft
Pro tip: Always budget for 10% extra materials – what I call the "peace of mind" factor.
Labor Considerations
Here's something many contractors won't tell you: proper installation often costs more than the materials themselves. Why? Because it's like brain surgery – you're paying for expertise, not just time. Quality installation typically ranges from:
- Basic installation: $30-45/sq ft
- Complex patterns: $45-60/sq ft
- Custom designs: $60-85/sq ft
Hidden Costs to Consider
In my experience, these often-overlooked factors can impact your budget:
- Surface preparation
- Waterproofing
- Removal of existing tiles
- Disposal fees
- Special equipment needs
The Value Equation
Let me share a recent example: A client chose premium porcelain tiles over basic ceramic, spending an extra $3,000. Five years later, their neighbors have already replaced their cheaper tiles twice, spending more in the long run. It's what I call the "buy once, cry once" principle.
Cost-Saving Strategies
Here's my insider advice for maximizing your investment:
- Focus high-end tiles on visible areas
- Consider mixing materials strategically
- Time your project during off-peak seasons
- Plan ahead to avoid rush charges
- Invest in proper maintenance
Long-Term Value Analysis
Consider this real-world math:
- Quality Installation + Premium Materials = 15-20 years
- Basic Installation + Economy Materials = 5-7 years
When you factor in replacement costs and pool downtime, investing in quality often proves more economical over time.
Return on Investment
One often-overlooked factor: a well-executed pool tile project typically returns 70-85% of its cost in home value. It's not just an expense – it's an investment in your property. Remember, the cheapest option often becomes the most expensive over time. As I tell my clients, "The sweet spot is finding the highest quality you can afford while staying within your budget."
Maintenance Tips for New Tiles: Protecting Your Investment

After installing countless pools over nearly five decades, I've learned that maintaining pool tiles is a lot like caring for a luxury car – regular attention and the right approach make all the difference. Let me share some insider tips that have helped my clients keep their pool tiles looking showroom-new for years.
The Three Pillars of Tile Care
I always tell my clients to remember what I call the "Three Pillars of Tile Care":
1. Regular Cleaning
- Weekly brushing along the waterline
- Monthly deep cleaning of visible tiles
- Quarterly inspection of all tiled surfaces
2. Chemical Balance
- Daily pH monitoring
- Weekly alkalinity checks
- Monthly calcium hardness testing
3. Preventive Care
- Seasonal professional inspections
- Prompt attention to any issues
- Proper winterization in colder climates
The Right Tools Make All the Difference
Here's my recommended maintenance toolkit:
- Soft-bristled brush (never use wire brushes!)
- Non-abrasive cleaning solutions
- Microfiber cloths
- Pool tile cleaner designed for your specific tile type
Pro tip: Keep your cleaning supplies separate from regular household cleaners to avoid cross-contamination.
Chemical Balance: The Secret Weapon
Think of your pool's chemical balance like your body's pH – when it's off, problems follow. I recently had a client who couldn't figure out why their new tiles were developing scale. Turns out their pH was consistently high, a simple fix that saved their tiles from permanent damage.
Seasonal Maintenance Schedule
Here's a proven schedule that's worked for hundreds of my clients:
Spring:
- Deep cleaning
- Grout inspection
- Chemical rebalancing
Summer:
- Weekly waterline cleaning
- Regular chemical monitoring
- Monthly tile inspection
Fall:
- Pre-winter deep clean
- Grout sealing (if needed)
- System check
Winter:
- Maintain chemical balance
- Monitor for freeze damage
- Plan for spring maintenance
Common Mistakes to Avoid
Over the years, I've seen well-meaning homeowners make these costly errors:
- Using household cleaners (they can damage tiles and grout)
- Pressure washing (can loosen tiles)
- Ignoring minor issues (they rarely stay minor)
- Skipping regular maintenance (always costs more in the long run)
The Long-Term Perspective
Remember, your pool tiles are an investment. Just like you wouldn't skip oil changes in your luxury car, don't skip pool maintenance. A little attention now saves significant money and hassle later.
Common Mistakes to Avoid: Lessons From the Pool Trenches

In my years of building and renovating pools, I've seen just about every mistake possible – and made a few myself early in my career. Let me share some hard-learned lessons that could save you time, money, and headaches in your pool tile project.
The DIY Dilemma
I'll never forget the client who proudly showed me his DIY tile job. He'd watched some YouTube videos and felt confident. Six months later, I was replacing every tile he'd installed. Think of pool tiling like heart surgery – just because you can watch it online doesn't mean you should try it yourself. Common DIY pitfalls include:
- Incorrect substrate preparation
- Poor waterproofing
- Improper adhesive application
- Uneven tile spacing
Material Selection Mishaps
One of the most costly mistakes I see is choosing materials based solely on price or aesthetics. Recently, a client insisted on using natural stone tiles for their entire pool – despite my warnings about maintenance. Two years later, they're dealing with constant sealing and calcium buildup issues.
Pro tip: Always choose materials based on their intended location and use, not just their look.
Installation Errors to Watch For
Even professional installers can make these mistakes. Here's what to look out for:
- Rushing the curing process
- Skipping proper waterproofing
- Using incorrect grout types
- Poor expansion joint planning
Maintenance Oversights
Think of pool maintenance like dental care – skip the regular checkups, and you'll end up with costly repairs. Common maintenance mistakes include:
- Using harsh cleaning chemicals
- Ignoring minor cracks or chips
- Failing to maintain proper water chemistry
- Skipping regular inspections
The Budget Trap
Here's something I've learned: there's a difference between being cost-conscious and being penny-wise, pound-foolish. One client opted for the cheapest possible tiles and installation. Within two years, they spent twice as much fixing problems as they would have investing in quality materials and proper installation from the start.
Project Planning Pitfalls
Poor planning is like trying to build a house without blueprints. Watch out for:
- Unrealistic timelines
- Inadequate material ordering
- Poor weather planning
- Lack of proper permits
The Warranty Warning
Always read the fine print! I've seen countless warranties voided because homeowners:
- Used incorrect cleaning products
- Skipped recommended maintenance
- Failed to document problems properly
- Modified installations without approval
Remember, in pool construction, like in life, an ounce of prevention is worth a pound of cure. The best way to avoid these mistakes? Work with experienced professionals who have a track record of successful installations and aren't afraid to show you their previous work.
Making the Right Choice: Partner With Pool Design Experts
After sharing these insights from our 48 years of experience in custom pool construction, we hope you understand why choosing the right pool tile contractor is crucial for your investment's success.
Our commitment to excellence isn't just about installing tiles – it's about creating lasting value for your home. We've helped hundreds of homeowners transform their backyards into stunning retreats, combining our technical expertise with an eye for design that stands the test of time.
What sets us apart is our comprehensive approach:
- Detailed assessment and planning
- Premium material selection
- Expert installation
- Ongoing support and maintenance guidance
When you choose us, you're not just getting a contractor; you're partnering with a team that treats your pool project with the same care and attention we would give our own homes. Our proven track record of successful installations and long-term client relationships speaks to our dedication to quality and service.
Ready to start your pool tile project with a team you can trust? Take the first step toward your dream pool by calling us at (310) 261-2440 or visit our contact us page. Let's discuss how we can help bring your vision to life while ensuring lasting quality and value for your investment.